Learn how to polish a car like a pro with our step-by-step guide. Get your car shining new again with our easy-to-follow car polishing tips. Don’t neglect the polishing step in your car maintenance routine and achieve a flawless finish with our top car polishing techniques.

Introduction: How to Polish a Car
Polishing your car can revive that showroom shine and make it look as good as new. It is an essential process of car maintenance that helps protect the paint against contamination and other environmental elements. Many people believe that only professionals can achieve that mirror finish, but with the right tools and techniques, you can easily do it yourself at home.
Polishing will remove scratches, swirls, and imperfections, leaving your car looking immaculate. However, it’s crucial to know the proper steps to avoid damaging the paint.
In this article, we’ll guide you through a step-by-step process on how to polish a car like a pro, and the best practices to ensure top-notch results.
The importance of polishing your car
Polishing your car is incredibly important, both for maintaining its appearance and protecting its paintwork. The paint on your car is constantly exposed to harsh weather conditions, including rain, hail, snow, and sunlight which can all cause damage over time. Polishing helps to remove any surface imperfections, such as scratches and swirls, that can detract from your car’s overall appearance.
It also helps to create a protective layer that repels dirt, dust, and other contaminants that can cause long-term damage. Regular polishing can also help to maintain the resale value of your car, as it keeps your car looking as good as new for longer.
Benefits of a shiny car
Having a shiny car has several benefits that go beyond just visual appeal.
Firstly, it can increase the resale value of the vehicle. A well-maintained car with a polished exterior would attract more buyers and fetch a higher price as compared to a dull, unkempt one.
Secondly, a shiny car is easier to clean and maintain. Any scratches, dings, or bird droppings on a shiny car are more visible and can be addressed earlier, thereby preventing any further damage.
Thirdly, a shiny car can also give a sense of pride and confidence to you. It reflects their commitment to maintaining their possession and also adds to their overall self-image.
Lastly, a shiny car can also be a safety factor. A well-polished car can reflect more light and make it more visible on the road, thereby reducing the risk of accidents.
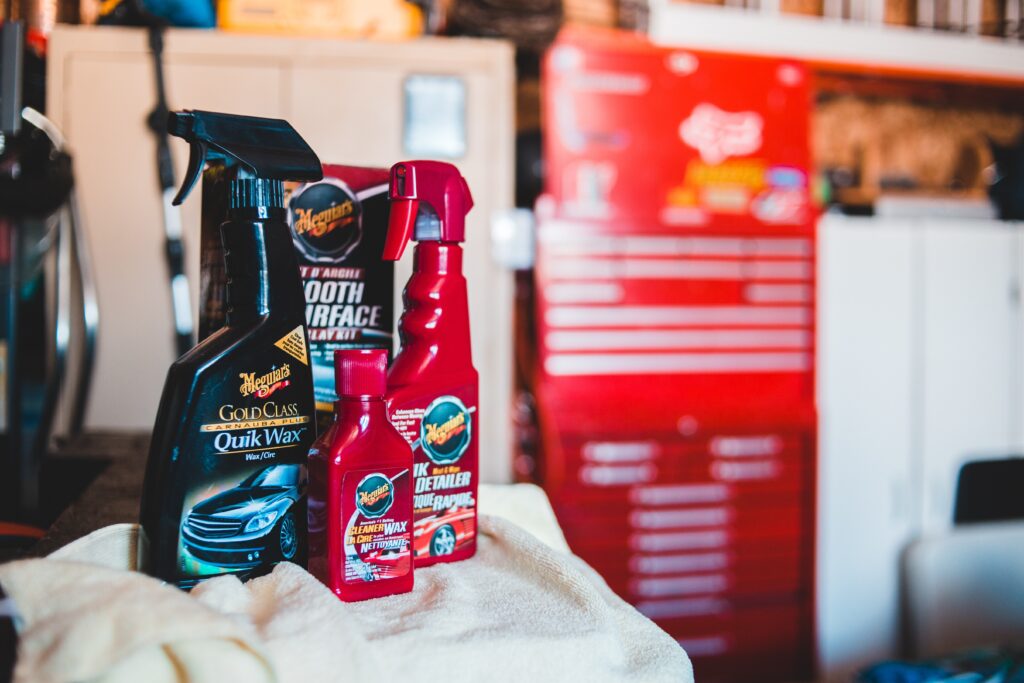
What you’ll need to polish your car
First, you’ll need a polishing compound or a car polish. You can choose between a standard polish and a clear coat-friendly polish, depending on your car’s finish.
Next, you’ll need a dual-action polisher or a polishing machine to apply the polish evenly. You’ll also need a series of polishing pads, ranging from rough to fine, to ensure smooth application.
You’ll need a microfiber towel to remove any excess polish following application. Finally, it’s always a good idea to have a wash mitt or clay bar to remove any surface contaminants before polishing.

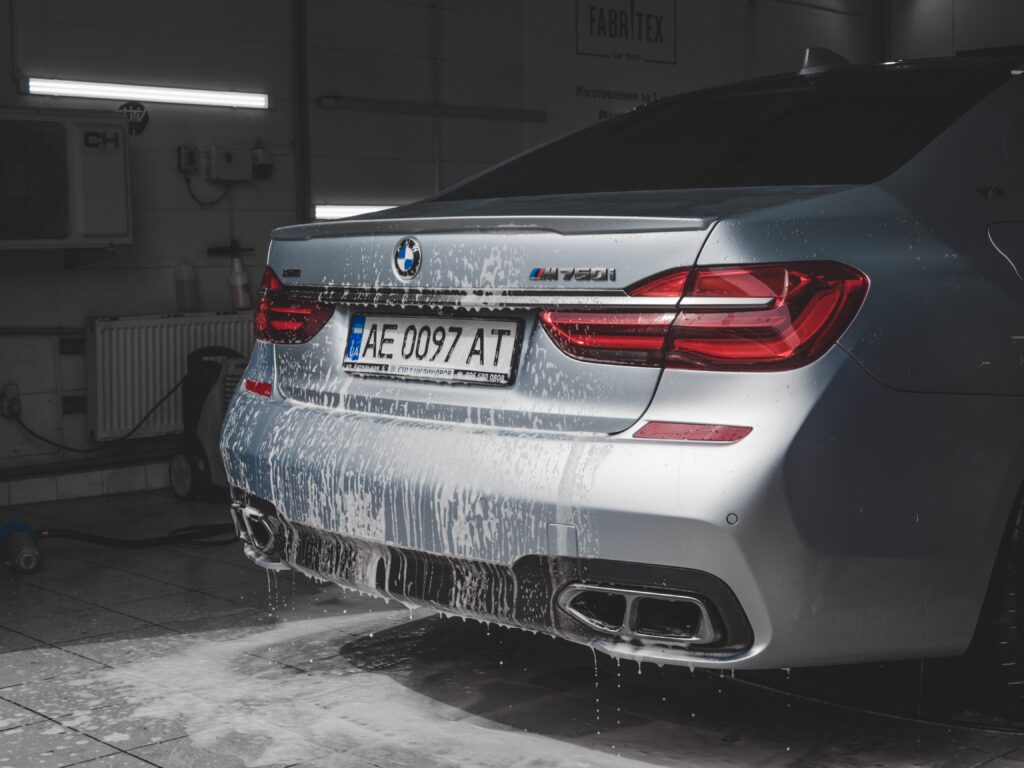
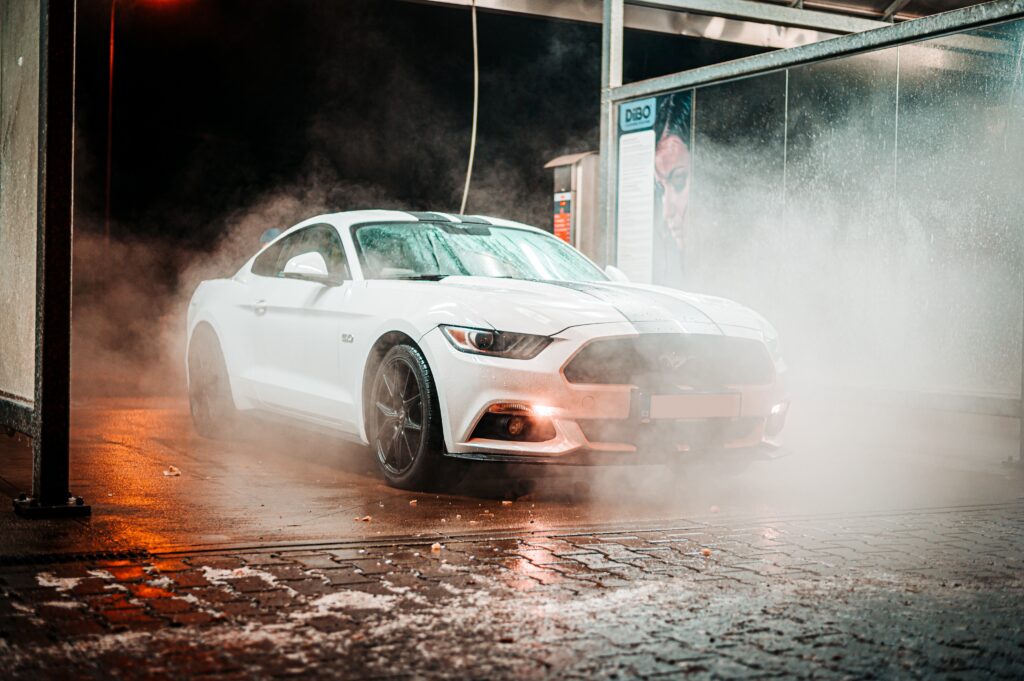
Step 1: Wash your car thoroughly
The first step in keeping your car clean and attractive is to thoroughly wash it. Start by rinsing your car with a hose to remove any loose dust or dirt. Next, apply a high-quality car washing soap to a clean, soft sponge or wash mitt and begin washing from the top down, working your way around the vehicle.
Be sure to use a separate bucket for rinsing the sponge or mitt to avoid scratching the paint. Be sure to rinse your sponge or mitt regularly to avoid scratching the paint.
Once the car is clean, rinse it thoroughly with a hose, making sure to remove all the soap suds.
The importance of starting with a clean car
Starting with a clean car is very important for various reasons.
Firstly, a clean car enhances your overall driving experience as it makes you feel good and comfortable, especially on long journeys.
Secondly, a clean car is a reflection of a responsible car owner who understands the importance of proper maintenance.
Thirdly, a clean car improves the overall health of the vehicle as it removes dirt, debris, and pollutants that could cause damage over time.
Moreover, a clean car can help retain its resale value as it shows that the car has been well taken care of.
Furthermore, a clean car can also reduce the likelihood of minor accidents as it provides better visibility through the windows and mirrors. Therefore, starting with a clean car is essential for both the aesthetics and performance of your vehicle, and can contribute towards a more enjoyable and safer driving experience.
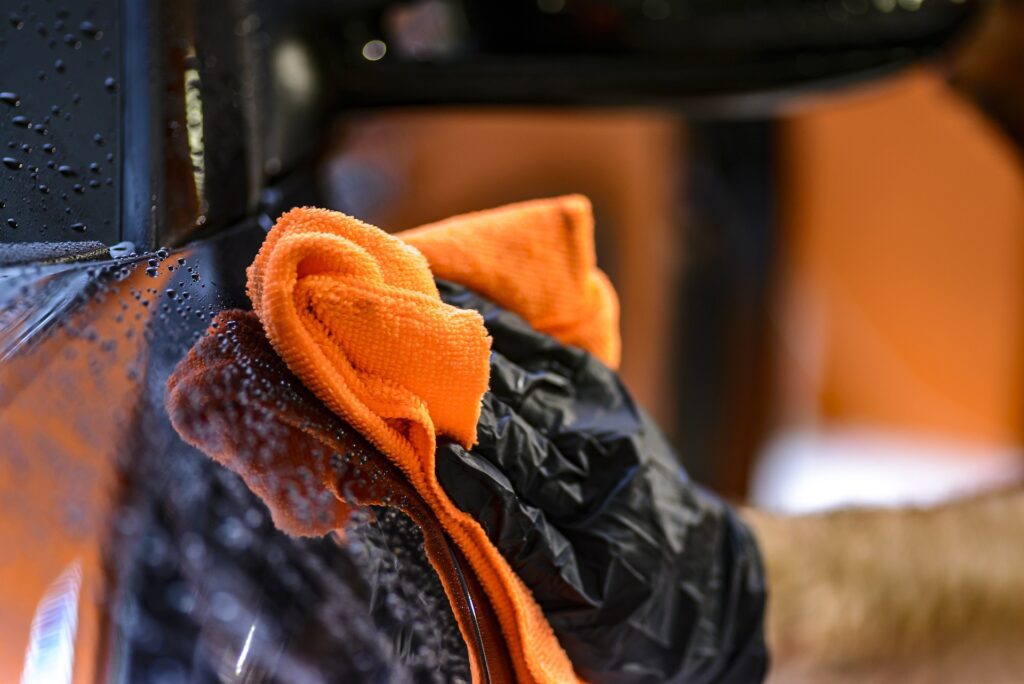
Step 2: Dry your car thoroughly
Once you have washed your car thoroughly, it’s time to dry it before you can start polishing it. Leaving your car wet for too long can cause water spots and streaks, so it’s important to dry it thoroughly.
Start by using a large microfiber towel to remove as much water as possible. Be sure to get into all the nooks and crannies, including the wheels and the gaps in the door handles. Once you have removed most of the water, use another clean and dry microfiber towel to go over the car one more time.
Once you have finished drying your car, you’re ready to start polishing.
Why you need to dry your car before polishing
Drying your car before you start polishing is one of the most important steps in car care. This is because residual water droplets left on the car’s surface can interfere with the polishing process and reduce the effectiveness of the product you’re applying. If you begin polishing your car without removing all water droplets, you may end up trapping them underneath the polish, which can create water spots and lead to inconsistency in the overall appearance of your car’s finish.
On top of that, water droplets can leave mineral deposits on your car’s paint over time, which can be difficult and costly to remove. So, it is essential to dry your car thoroughly before polishing it to ensure that the final result is no less than perfect.
Tips for drying your car without leaving streaks
Make sure you’re using a lint-free towel to avoid leaving any fibers on your car’s surface.
Wiping gently in circular motions is the most effective way to dry your car without leaving any marks behind.
If you’re having trouble getting rid of streaks, try using a detailing spray. Spray it onto the surface of your car and wipe it off with a microfiber towel. This should help to remove any remaining water spots or streaks.
Step 3: Assess the condition of your car’s paint
Inspect the paintwork for any chips, scratches, dents, or areas of fading or discoloration. Addressing these issues beforehand is essential in ensuring that the protective coating adheres correctly and lasts longer. If repairs are needed, you can opt to do them yourself or seek the services of a professional detailer.
After repairs or touch-ups, reinspect the surface before proceeding to the next step.
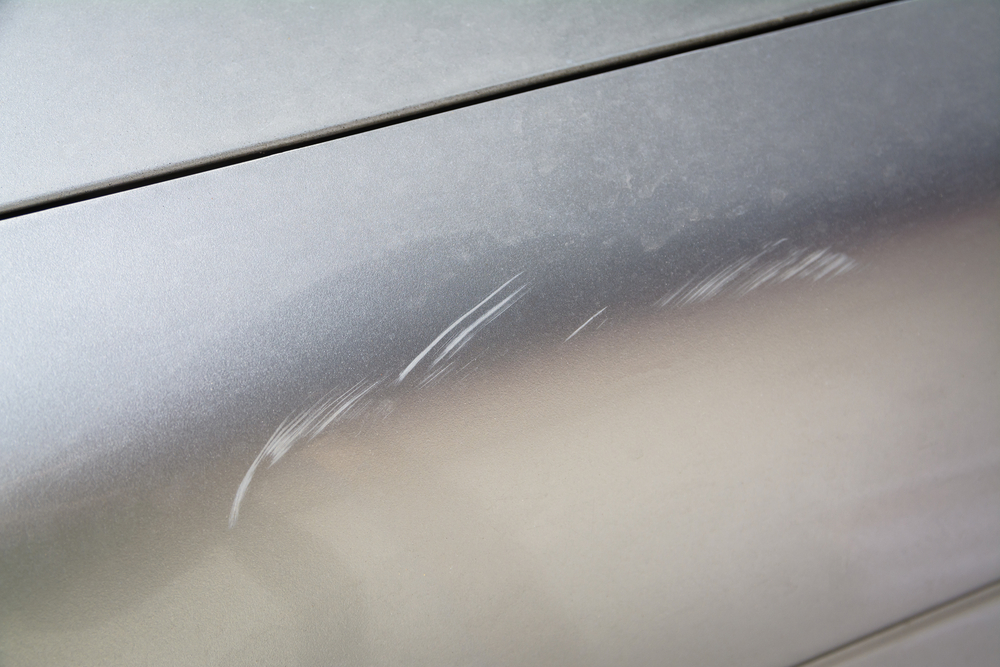
Identifying swirl marks, scratches, and other imperfections
Identifying swirl marks, scratches, and other imperfections on the surface of a car can be a challenging task, but it is essential for achieving a refined and polished look.
Swirl marks are fine lines that are caused by improper washing techniques or using abrasive materials.
Scratches may occur due to minor accidents and encounters with everyday objects.
Other imperfections, such as dents or chips in the paint, often require professional repair.
To identify these imperfections, it is essential to examine the surface of the car carefully, using proper lighting and a critical eye. One way to do this is by running your fingers over the surface to detect any irregularities.
Another method is by shining a bright light over the surface at an angle to identify any scratches or swirl marks.
Step 4: Choose the right type of polish for your car
Choosing the right type of polish for your car can make a huge difference in the way it looks and how well it protects the paint.
Understanding different types of polish
There are generally two types of polishes available: abrasive and non-abrasive.
Abrasive polishes are usually used for correcting scratches, swirl marks, and other imperfections in the paint. They contain small particles or compounds that break down uneven surfaces and leave a smooth, reflective finish.
Non-abrasive polishes are used to enhance the shine and gloss of already perfect paintwork. They contain oils, waxes, and polymers that bond with the surface to provide a protective layer against UV rays and contaminants.
When shopping for a polish, it’s important to pay attention to the label and choose the one that is compatible with your car’s color, type of paint, and level of damage. Always keep in mind that polishing can be dangerous if not done right, so make sure to follow the instructions and use the right tools to avoid any harm to the paintwork.
How to choose a suitable polish for your car’s paint
Choosing the right polish for your car’s paint can make a huge difference in maintaining the appearance of your vehicle. The first step is to determine the type of paint your car has.
Cars with clear-coat finishes require a polish specifically designed for clear-coat paints.
Next, consider the severity of scratches, if any, on your car’s paint. If it’s a light scratch, a mild abrasive polish should work just fine.
For deeper scratches, a heavier abrasive polish may be necessary. It’s also important to consider the age and condition of your car’s paint. If you have an older car with faded paint, polish with a bit of wax may provide better results.
Lastly, make sure to choose a polish that’s appropriate for your car’s color. Some polishes can discolor or dull certain colors, so it’s important to read the label and choose the right one accordingly.
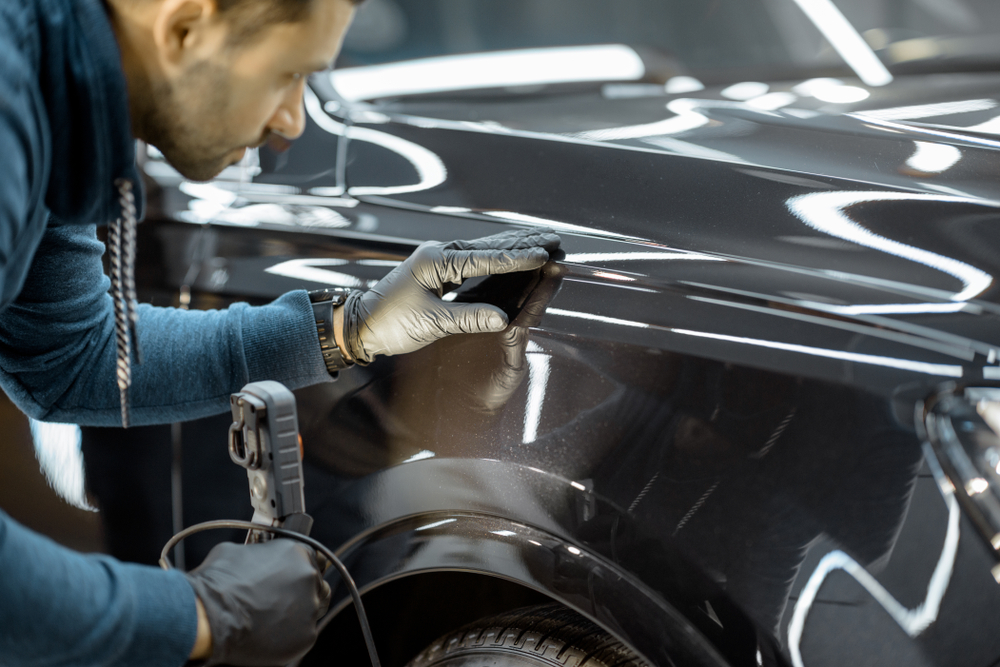
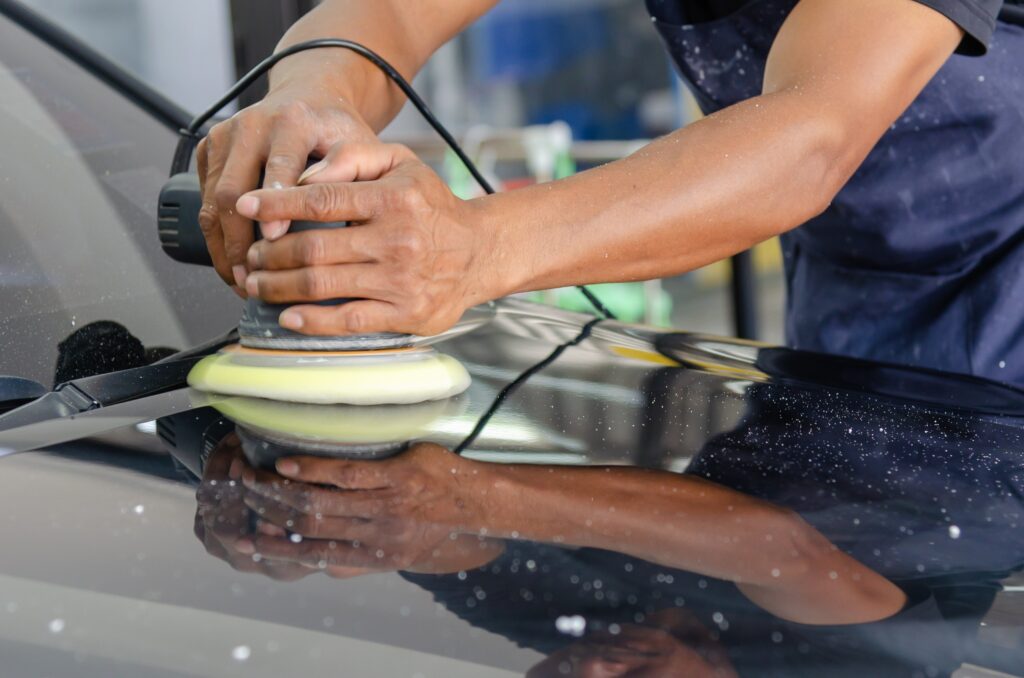
Step 5: Apply polish to your car and begin Buffing
Applying polish to your car is a crucial part of maintaining its appearance and longevity. When you’re ready to apply the polish, make sure you have the necessary materials, including a pad and polish.
First, spread the polish on the pad and begin to work on one section of the car at a time. Make sure you’re covering the entire section before moving on to the next.
As you work, be sure to watch out for paint defects, such as swirl marks and scratches, and polish them out with careful, circular motions.
When the first section is complete, move on to the next until the whole car has been polished. Be sure to work carefully and methodically, so you don’t miss any spots.
The right tools for the job
In order to achieve a flawless and immaculate finish when polishing a car, it is imperative to have the right tools for the job.
A high-quality dual-action polisher or buffer is essential, as it will provide the necessary power and motion to effectively buff out any imperfections or scratches on the paintwork.
Additionally, a selection of foam pads with varying degrees of abrasiveness is important to ensure that the correct pad is used for the specific job at hand.
A clay bar can also be used to remove any contaminants on the surface before polishing.
Quality car wax or sealant should be applied to the paintwork to protect and enhance the shine. Using inferior or unsuitable tools can result in a subpar finish that may not last as long or hold up against the elements. Investing in the right equipment is essential when achieving a professional and long-lasting polish on a car.
Tips for applying polish evenly
Applying polish evenly on a car’s paint gives it a seamless and glossy finish that can make it look brand new. To achieve this, there are a few tips to follow when buffing the polish onto the car’s surface.
Firstly, make sure the car is clean and dry before applying the polish. Otherwise, any dirt or moisture can cause streaks or spots after polishing.
Secondly, apply the polish in small amounts, using a soft microfiber cloth or applicator pad.
Rub the polish in a circular motion, starting from one end of the car to the other. This prevents swirl marks and ensures that the surface is evenly coated.
Lastly, let the polish dry completely before removing it with a clean cloth or buffer. Take your time and pay attention to detail, and your car’s paint will have a smooth polished finish.
How to Buff your car with a dual-action polisher or buffer
To begin, attach the foam pad to your polisher and apply a small amount of polish to the pad. Also, apply small amounts of polish to the panel you are working on. This helps keep an even amount of polish on the paint.
Start by working on a small section of your car and apply the polish in a back-and-forth motion, keeping the pad level on the surface. Hold the polisher with both hands and apply gentle pressure as you move the pad back and forth in a straight line. Make sure to keep the pad level on the surface at all times to prevent any swirls or scratches.
Overlap your passes slightly to ensure maximum coverage and continue until the entire section of the car has been polished. Then wipe off any excess polish with a microfiber towel. Remember to work on small sections at a time. With practice, you can improve your technique and achieve a flawless finish.
Step 8: Apply a coat of sealant or wax
After cleaning and polishing your car’s exterior, it is recommended to apply a coat of sealant or wax to help protect the paint and prolong its shine.
Why you need to seal or wax your car after polishing
Sealing or waxing your car will provide a barrier to protect the paint from fading or peeling due to sun exposure and help it repel water and contaminants. It will also make future cleaning and maintenance of your car easier.
A sealant works by chemically bonding to the clear coat, creating a layer of protection against UV rays, water, pollutants, and other environmental factors. Wax provides a physical barrier that repels water, dirt, and dust and adds a smooth, glossy finish to the paint.
How to choose the right sealant or wax for your car
Choosing the right sealant or wax for your car can seem overwhelming with so many options available.
Firstly, consider the type of protection you want, including UV resistance and water-repelling properties. Consider the ingredients, as some may contain harmful chemicals.
Next, think about the level of shine you want, as some products offer a glossy finish while others provide a matte look.
Lastly, read reviews and ask for recommendations based on your vehicle type and climate to ensure you make the right choice.
How to Apply Sealant or Wax to Your Car
To apply the sealant or wax, shake the bottle well and dispense a small amount onto an applicator pad. Work in small sections, applying the product in thin, even layers, making sure to avoid overlapping onto unpainted plastic or rubber parts.
Let the product dry to a haze or cure according to the instructions, then buff off the residue with a clean microfiber towel. Repeat the process for the entire car’s surface, including the hood, roof, doors, and trunk.
Step 9: Maintain your car’s shine
If you want to keep your car looking new and shiny, there are several tips you can follow.
Tips for keeping your car looking shiny and new
Regular car washes, waxing and polishing, and avoiding harsh chemicals are key to keeping your car looking shiny and new.
Store your vehicle in a garage or carport to protect it from the elements, and avoid parking under trees to prevent sap and bird droppings from damaging the paint. If you do not have access to covered parking then purchasing a car cover for your make and model will work.
Regularly cleaning the interior and vacuuming also helps maintain a clean and impressive look.
How often to polish your car
You should aim to polish your car every 3 to 6 months. This will help maintain the paintwork, prevent corrosion, and keep your car looking glossy and new. However, the frequency of polishing may vary depending on the type of paint finish and the environmental conditions your car is exposed to.
Treat any imperfections with a rubbing compound
( wet sanding )
Maintaining the exterior of your car is essential to ensure that it looks its best for as long as possible. Scratches, swirl marks, and oxidation are some of the most common imperfections that can ruin the appearance of your car. Rubbing compound, also known as wet sanding, is one technique that can be used to treat these imperfections.
However, before wet sanding, it’s important to determine which imperfections require this treatment.
Identifying imperfections
If the scratch or mark is deep enough to catch your fingernail, a rubbing compound will be necessary to remove it. On the other hand, if it’s a light scratch or scuff mark, a simple polish or wax can do the trick.
Applying rubbing compound safely and effectively
Before applying the rubbing compound, ensure that you’re working in an area that’s free from direct sunlight to prevent the rubbing compound from drying out too quickly. You’ll also want to avoid using a rubbing compound on plastic or rubber surfaces, as it can damage or discolor these materials.
Once you’re ready to start, clean and dry the affected area. Apply the rubbing compound to a foam applicator pad or microfiber towel and work in small areas, rubbing in a circular motion. Avoid applying too much pressure, as this can cause further damage to the paint.
Once you’ve finished, wipe off the residue with a clean, dry microfiber towel. You may need to repeat this process a few times to achieve the desired result.
Using sandpaper for deeper scratches
For deep scratches, you may need to use sandpaper to achieve the best results. Wet sanding involves using special sandpaper with a wet sanding technique to remove a thin layer of paint from the surface of the car.
This process should only be performed by professionals or individuals with experience to avoid removing too much of the car’s clear coat. *Wet sand at your own Risk*
Before starting the wet sanding process, tape off any areas that don’t need to be sanded, such as trim and rubber seals, to prevent damage.
Use sandpaper with a grit of around 1500 if the scratches are deep or 2000 if they are moderate. Anything lower than 1500 grit sandpaper can cause damage to the car’s clear coat. I recommend only using 1500 if you know more about how sanding works on cars.
how To Use Sand Paper
To start the wet sanding process, soak the sandpaper in water before using it.
Begin sanding the affected area in a circular motion, being careful not to apply too much pressure. Keep the sandpaper wet throughout the process to prevent any damage to the car’s paint.
Once the first round of sanding is complete, move on to higher-grit sandpaper, such as 2000-3000, and continue sanding in a circular motion. Repeat the process with 3000-grit sandpaper until the surface is smooth and any scratches have been removed.
Wet sanding will make the area look very white and hazy this is corrected by polishing the area again. You can use the same polish compound you used to polish the whole car in Step 5.
Wet sanding will make the area look very white and hazy this is corrected by polishing the area again.
Safety measures
While using rubbing compound or wet sanding, it’s important to keep safety in mind. Wear gloves and eye protection to avoid coming into contact with the chemicals found in the compound. If you’re working outdoors, be mindful of your surroundings and avoid inhaling any dust particles that may be generated.
Additionally, avoid using rubbing compound too frequently, as it can thin out the paint on your vehicle over time.
Overall, rubbing compounds and wet sanding can be helpful techniques to remove scratches and imperfections from car paint. However, it’s important to use them correctly and safely to avoid damaging the car’s clear coat or paint.
Conclusion
In conclusion, polishing a car is not a difficult task, but it requires time, effort, and attention to detail. By following the nine simple steps outlined in this guide, anyone can achieve a professional-looking finish on their vehicle. Remember to start with a clean surface, use quality products, work in small sections, and take your time. With a little practice, you can achieve a mirror-like shine and protect your car’s paint for years to come. So go ahead and give your car the care it deserves, and enjoy the satisfaction of a job well done.

For a comprehensive Guide on detailing your car, check out my article: Ultimate Beginner’s Guide: How To Detail a Car in 13 steps for a Pro-Level Shine
Is It Better To Wax Or Polish A Car?
It depends on what you want to achieve. Wax will protect the surface and give shine, while polishing will remove scratches and leave a smooth surface.
Can You Polish a Car Yourself?
Yes, you can polish a car yourself with the right tools and products.
Do I Wax or Polish First?
You should polish the car first to remove any imperfections on the surface, and then apply wax to protect and give shine.
What is the best thing to polish your car with?
It’s best to use products specifically designed for polishing cars, such as polishing compounds and polishing cloths.
How Do You Polish A Car By Hand?
Prepare the surface by washing and drying the car, then apply the polishing compound to a soft cloth and evenly rub it onto the surface in circular motions. Once finished, wipe the surface with a clean cloth and apply a protective layer of wax.